Wednesday, June 21, 2017
Tuesday, June 20, 2017
Juliekarsky
Juliekarsky: Hi! Thank you for stopping by my shop. I am an artist and lover of all things made by hand. I hope you see something you like.
Sunday, September 6, 2015
Creative buttons

I was working on a commission project
recently; it was designed as a wall hanging and to add a little bit of creative
flare I thought I would add some buttons to the appliquéd flower. The only
problem is that I could not find any buttons that I liked. So I decided to make
my own.

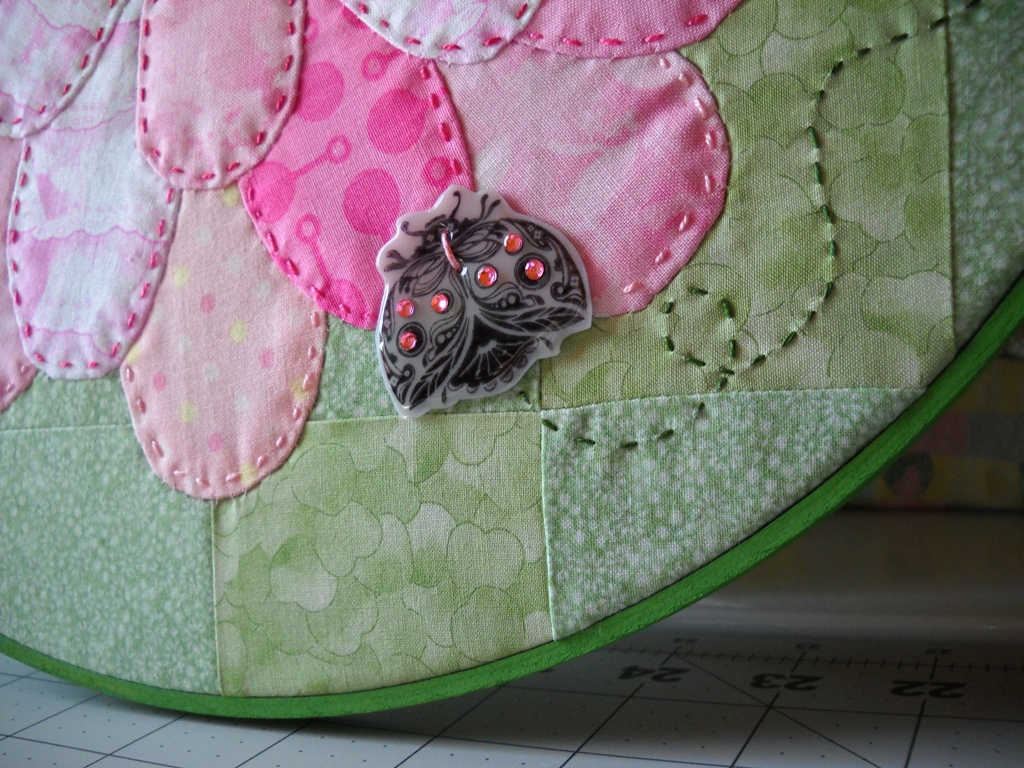
Here I used a simple bug stamp that I
stamped on some plastic that I cut out of a used milk jug. I used black
permanent ink and also punched a couple holes in each one for sewing the button
on later. They were then baked in the oven and set aside to cool.

When cooled I added a layer of Glossy
Accents and let it dry and then added another layer and let dry. Then I glued
on some lovely rhinestones to add sparkle.
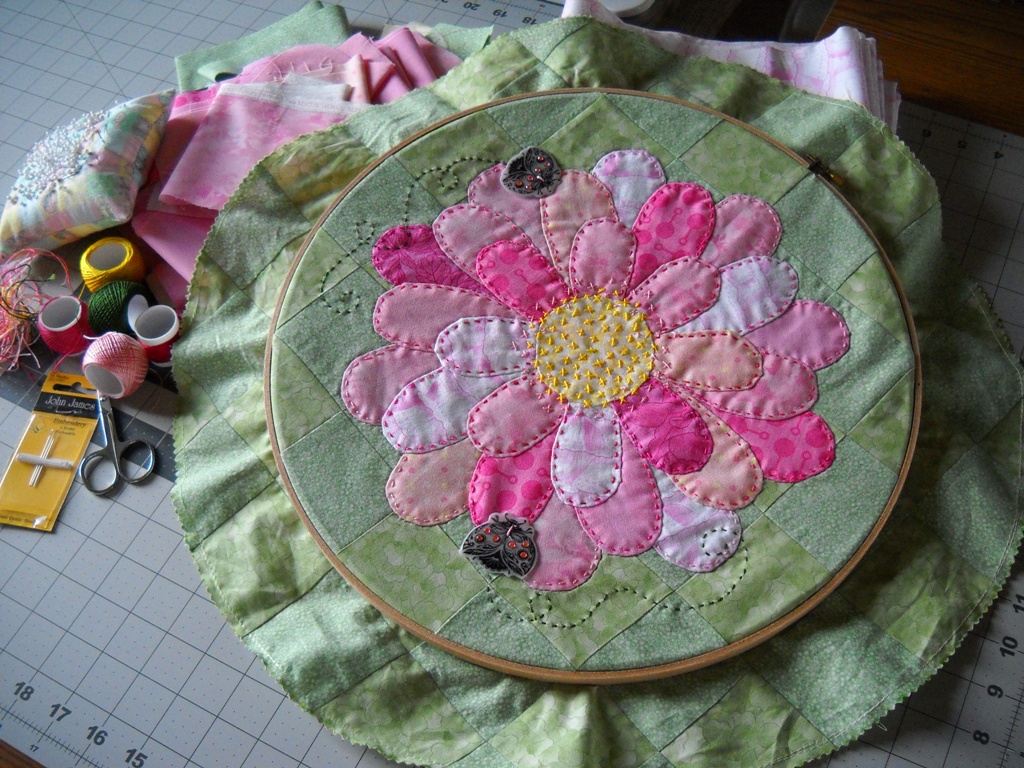
I decided on the Lady bugs in the
end, and I attached them by sewing them on with Pearle cotton thread. Then a
little hand embroidering and the piece is coming together very nicely, I think.

This
is one of those pieces I would just love to keep for myself, but I suppose I
could make another!
Sunday, August 2, 2015
New painting project
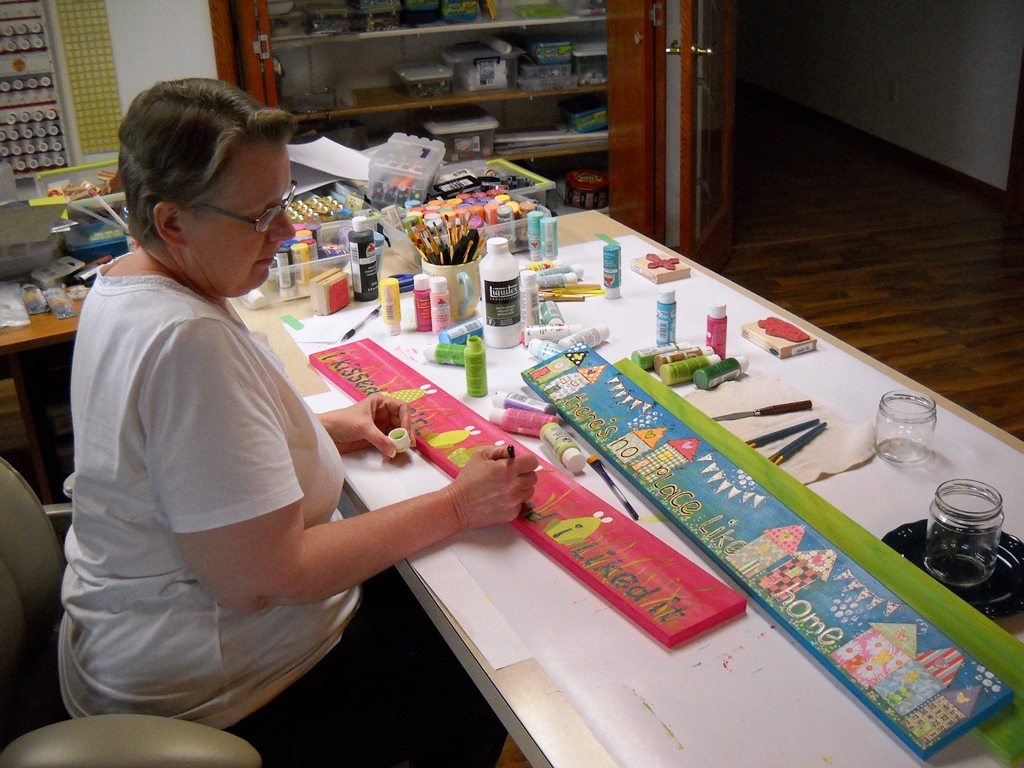
I
have had this project in my mind for awhile now and decided it was time to give
it a try.

I brought all of my
painting supplies out and started by painting the boards. Then I hand cut my
papers and made some sweet little frogs and painted cattails in the background.

I love to add words
to my art. Just little quotes or phrases. With a very small curved scissors I
cut my letters freehand. I think it adds to the whimsey of my art.
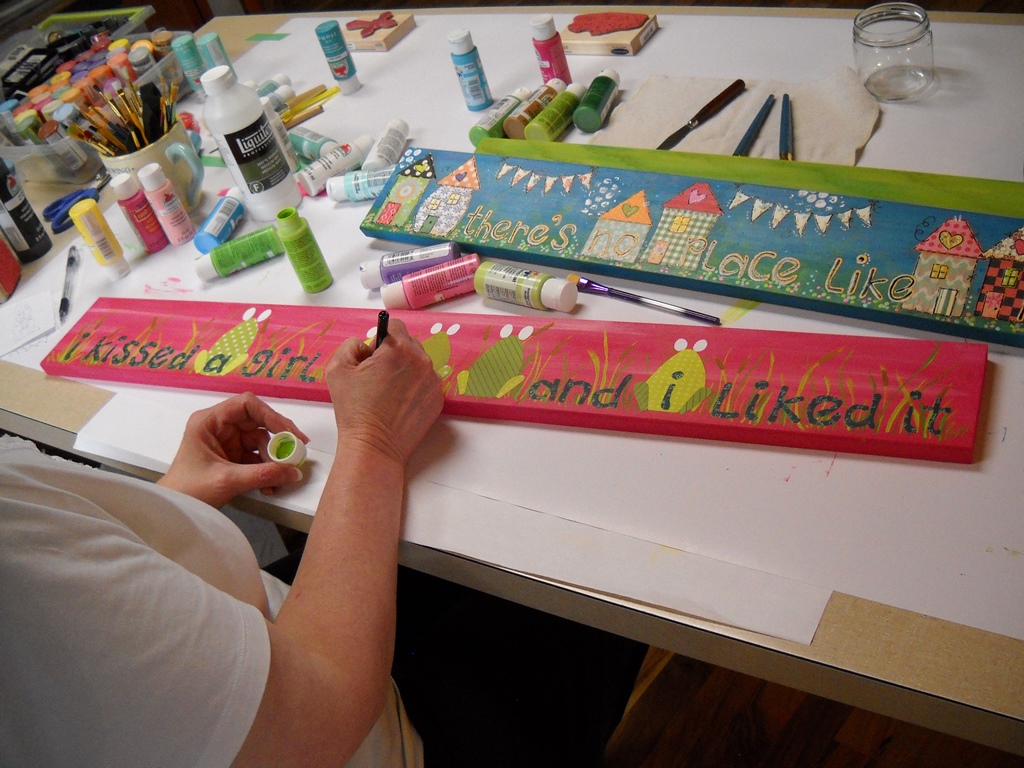
After all the papers are glued in
place I might add more painting. Then I just love to take my black gel pen and
outline the shapes and add cross hatches and squiggly lines. Then I go in with
markers for shading or maybe some of my gelatos too. I think it is about
finished. The houses went to one of my daughters and my sweet frogs are now
available in my Etsy shop. These works of art look beautiful hung over a door
or window. My daughter hung hers on a header separating her kitchen from her
dining room. She told me she wanted to hang it where she could see it all the
time!
Friday, April 18, 2014
Sorry I have been away so long!
Well,it is about time I get back into my blogging. So much has been happening. I have changed direction and I am making new art. It is mixed media on canvas panels, stretched canvas and aspen wood. I am having such a great time with all the papers, paints and especially gelatos! Here is one of my earliest attempts...
.JPG)
.JPG)
.JPG)
.JPG)
.JPG)
.JPG)
.JPG)
.JPG)
.JPG)
.JPG)
.JPG)
.JPG)
I will try to post more each week. Tomorrow will be busy with 2 granddaughters coming over and helping me shop for Easter. Almost the entire family will be here. It will be so much fun watching all the little ones look for Easter eggs! Happy Easter to you all and I hope you have a special day with those you love!
Tuesday, February 25, 2014
Bunny Kisses
Bunny Kisses
.JPG)
I can’t
believe Easter is around the corner. It is already February and it seems like
it has been a really long and cold winter here in central Minnesota. I am so
anxious for spring. As I got started on my new art I began with some canvas
panels I picked up at the craft store. I picked pale lavender for the
background and added a little white paint on the surface. I wanted a very soft
appearance so I am using light colored papers for the bunnies. After gluing
them down and letting it dry I outlined the shapes with a black gel pen and
added squiggles and lines.
.JPG)
The gel
pen usually dries pretty fast, but I like to let it set for a couple hours to
give it plenty of dry time. I should probably mention that I painted a little
more on the canvas before I glued the papers on. I added yellow and a darker
purple paint that I applied with my fingers.
.JPG)
For
shadows I like to use Gelatos. They have such a creamy texture, and blend so
well on painted canvas. I rub them in with my fingers, and if I need to remove
some, I use baby wipes. They are very forgiving to work with. With a purple gel
pen I added a heart shaped nose and black for the eyes.
.JPG)
I am
almost done, but I felt it needed more, so I painted them in a garden of
flowers and added text. I sometimes print words on cardstock and glue them on
the surface of the art. This is the last step I do, along with some glitter for
sparkle. Now my fun time is done! “Bunny Kisses” is for sale in my new Etsy
shop at https://www.etsy.com/listing/177408363/home-decor-mixed-media-art-painting?ref=shop_home_active_16 Take a peek and visit often! Thank you for stopping by!
Wednesday, February 19, 2014
.JPG)
Well, after much work and trial and error I think my blog is working again. After my last post, I could not get any of my photos to download and post to the blog and I could not type anything either. I have changed my browser (and alot of other little things) and it looks like that did the trick. I sure hope so, because all this was so frustrating. But I do have lots of new art to show you. I also have opened my Etsy shop... https://www.etsy.com/shop/juliekarsky
Please stop by and see all that is new! Have a great Wednesday!---Julie
Sunday, February 2, 2014
I am Back!!!
After taking a long break from blogging I decided to try some new artwork. I haven’t been doing a lot of sewing lately, because I have really started to enjoy working on mixed media art. I will be posting some of the new things I have been making. I am experimenting with different surfaces ranging from stretched canvas to canvas panels. My husband, Joe, picked up some aspen wood, and we cut it into different size blocks. I am really enjoying working with wood, also. So, here we go with my new artwork for 2014! I hope you enjoy it, and please leave comments. I would love to hear what you are thinking!
After taking a long break from blogging I decided to try some new artwork. I haven’t been doing a lot of sewing lately, because I have really started to enjoy working on mixed media art. I will be posting some of the new things I have been making. I am experimenting with different surfaces ranging from stretched canvas to canvas panels. My husband, Joe, picked up some aspen wood, and we cut it into different size blocks. I am really enjoying working with wood, also. So, here we go with my new artwork for 2014! I hope you enjoy it, and please leave comments. I would love to hear what you are thinking!
Wednesday, March 6, 2013
Sydney’s Baby Quilted
.JPG)
With
my newest little granddaughter here, I knew I had to get her baby quilt
finished
.JPG)
I
had some pieces left from another project, and it was just enough to make this
darling quilt
.JPG)
This fabric was from
a Daisy Kingdom line that I got for $1.00 a yard when it went on clearance. It
is actually dress fabric for little girls. I cut apart the striped fabric that
was meant for the skirt of the dress, and incorporated it into the border.
.JPG)
This little quilt is
for Sydney, our latest granddaughter, and since she came into the world early
she is very small. I avoided using cotton batting by Warm and Natural, since it
would be a little too much weight on her, so I used a polyester batting by
Morning Glory. It made the quilt so light and fluffy.
.JPG)
This batting was so
nice to hand quilt through. I pieced yellow sashing strips and used a
coordinating fabric for the blocks.
.JPG)
Here you can see a
close up of the adorable fabric I used. It has little paper dolls all around
the border.
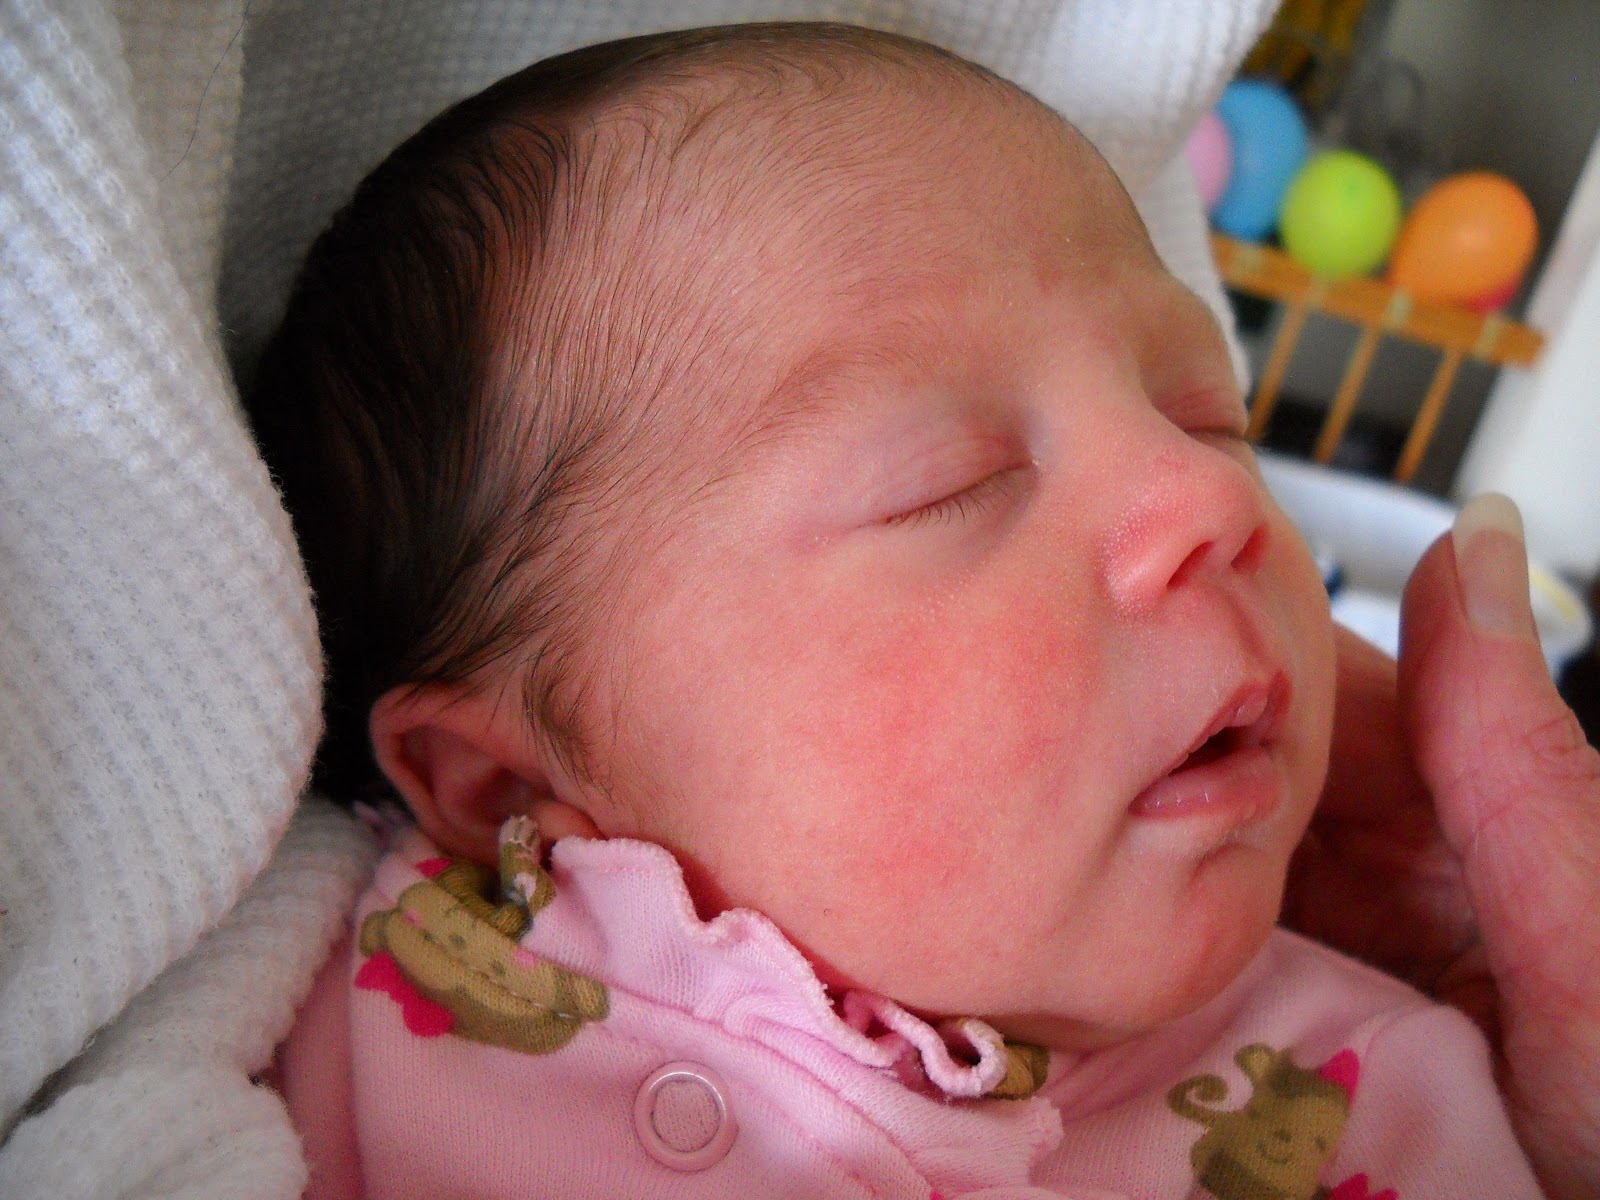
The newest addition
to our family, little Sydney! She is our tiny angel! What a beautiful gift from
God!
Wednesday, February 27, 2013
Victorian Crazy Quilt – Block 16 Buttonhole Stitch
I am sorry for my long absence, for all my dedicated followers please do enjoy this months Victorian Crazy Quilt block
.JPG)
Well, it is time again to post
another block from my Victorian Crazy quilt. This block was named for the
buttonhole stitching I did around the outside of all four sides. I just love
this stitch. You can do so many other variations as long as you know this simple
stitch.
.JPG)
I always try to make the center of
the block extra pretty and add something special to it. Here I started with the
feather stitch and added long gold bugle beads.
.JPG)
Did you notice when I stitched these
blocks I did not color coordinate fabric with threads. By using contrasting
colors of embroidery threads, your stitching is going to stand out even more
instead of blending into the background.
.JPG)
I embroidered a simple flower in the
right hand corner of this block. I wanted to add a yellow stone to the
center. You can see how I had to stitch
it on in several places from the center hole in the stone to keep it secured in
place.
.JPG)
The cretan stitch is another favorite
of mine. By adding 4 long straight stitches to each side in red and cream
threads, it really changed the look and made the row suddenly wider and more
complex.
.JPG)
I think my favorite part of this
block is the yellow and purple flowers. Instead of stitching leaves on the
stems, I added silver bugle beads.
Tuesday, December 25, 2012
Some Fun Time, Art work, mixed media
I have been thinking of
making another paper quilt. I finished one this past year, and sent it to
Stampington and Company for a magazine submission. They had a project that called for making a
piece of art using the color “aqua” and I made a paper quilt very similar to
this one. I designed my little crazy quilt blocks using Acrylic paper by Strathmore.
I just love this paper. It is very thick and stands up to all the coloring and
inking that I do. I used gel pens to create all the embroidery stitches on the
blocks. The quilt was designed on mat board. I added a feathered border and
quilting lines in the background. I did a lot of inking with brown ink to the
quilting lines before I added the blocks. I coated it with Mod Podge and will
be adding rhinestones to make it sparkle.
.JPG)
.JPG)
.JPG)
So many things to do… I
thought I would take a break, and have a little fun drawing and coloring again.
I recently put my 2013 Snowman Calendar on my Etsy shop, and just looking at
those drawings of silly snowpeople made me want to draw a snowman. I was
reading quotes online one day, and came across a saying by Dr. Seuss. It goes
like this: “Don’t cry because it’s over, smile because it happened.” I decided
to draw a snowman as he changes shape in the month of April. The spring rains
have started and our snowman is melting. His buttons are falling off, along
with his carrot nose. Poor guy! His glasses fell to the ground when he lost his
nose. I gave him an umbrella to shelter himself from the melting rain. Even the green grass is starting to show
through the snow. His time is almost over, but I know come next winter he will
be back! I started with a piece of matt board 8 ½ x 19 ½. I drew my snowman
image, and added a one inch grid to the background on the diagonal. When the
coloring was done, I inked the background to tone it down a bit. Then I added
the quote using some chipboard letters that I inked, and my own lettering and
torn papers. I found some epoxy raindrops in a sticker pack, and they seemed
very appropriate for this project. It was coated in Mod Podge and sprayed with
an acrylic mat spray.
.JPG)
.JPG)
.JPG)
Victorian Crazy Quilt, Timeless Treasure, Charmed, Elegant, Elegance, Embroidered Blossoms, Floral Blooms, Beads, embroidery
Charming
.JPG)
The tradition of
crazy quilting began in the Victorian Age. While this art form first caught on
in Europe, here in America crazy quilting was based more on utility and
necessity. Wives and mothers needed to cover their families in cold weather,
and fancy needlework was not practical.
.JPG)
When I am piecing my
blocks, I think about composition. I try to lay out my fabrics before I start
sewing. In this quilt I used a variety of bright and dark fabrics, and also
used pastels. I wanted the eye to travel across the block and have lots of
interesting areas to view.
.JPG)
The stitching within this area of pink
satin turned out exquisite. The yellow and blue threads I used to create the
daisies looked lovely on the pastel satin.
I used the buttonhole stitch with various lengths to make the stems and
grass.
.JPG)
The upper left corner of this block
took on a look of its own, as I added the green vines.
.JPG)
I started with the cretan stitch in
baby blue and used the straight stitch in various lengths starting in the
center of each cretan stitch. It had a nice soft look and filled in the area
nicely.
.JPG)
Although Victorian quilts are heavily
embellished, there are areas where the embroidery thread makes a strong
statement by itself. As you can see here, I did not need to add any beads to
make this area interesting. The primary thing to remember is that every seam
does need to be covered.
Wednesday, December 5, 2012
Victorian Crazy Quilt – Lattice Work – Block 14
Lattice Work
.JPG)
When I first started this quilt I
didn’t have any idea how to make a crazy quilt. I had a lot of leftover fabrics
from previous projects and even a few bridesmaid dresses that I knew I could
incorporate into this quilt. I cut the dresses apart and added them into the
blocks. I started with a square of muslin and a center piece of fabric that I
cut at an odd shape, usually with 5 sides. This gave me a lot of angles to
start adding various fabric shapes to. And from there the block just grew. I
continued to add odd shaped pieces until I had the muslin base fabric covered.
Then the block was trimmed to size.
.JPG)
Most people don’t regard black as a
beautiful color, but when combined with other colors it becomes so appealing.
.JPG)
Here you can see where I took 3
totally different beads and put them together after I added a row of feather
stitches.
.JPG)
Here I laid down 2 rows of the
herringbone stitch to look like a lattice fence. Then I added stems, leaves and
flowers.
.JPG)
One of the tricks in keeping each
block different and interesting is the use of a multitude of colored threads.
In this photo you can really see this technique being applied.
.JPG)
In just this one row I used 5 different
colored threads to cover just this one seam alone. As I look at just this one tiny
area of this block I think of the time spent in creating it. Then take that by
56 totally different blocks in the entire quilt, and it just boggles the mind.
Subscribe to:
Posts (Atom)