

I found this adorable fabric at the craft store. It has cupcakes printed on it, so using that as a theme for one of my bags seemed like a great short project. Selecting the fabrics for this project was a joy. I picked the softest pastels to go with the theme fabric and one bright pink for contrast. For the lining of the bag I chose a piece of fabric that had small pink flowers on it that was a coordinating print to the cupcakes fabric. To add a little extra to the project I picked up some cupcake buttons.

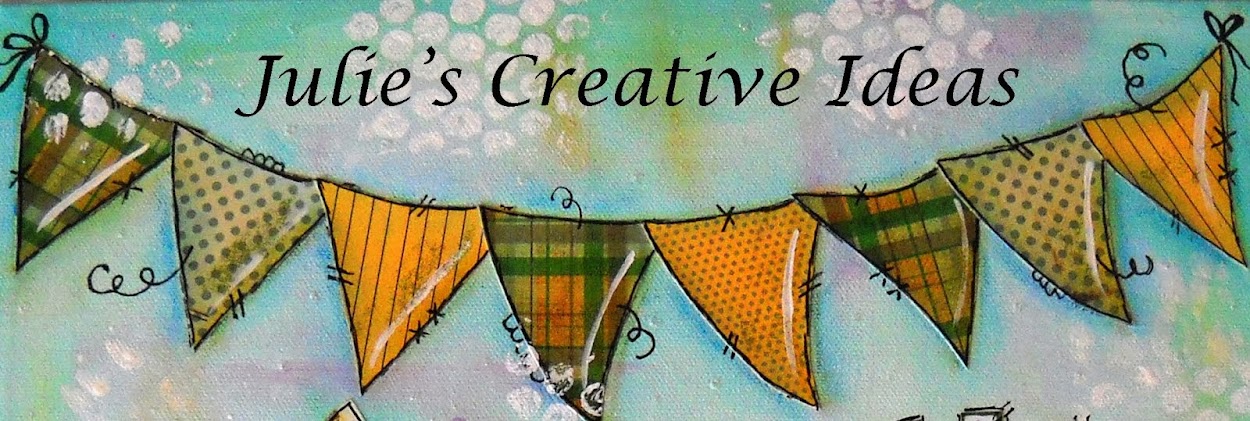
After the cutting of the fabric I started the assembling process. Here you can see the front and back panels sewn together and also the lined pockets between the straps. The straps are sewn to the base of the bag, but not attached to the sides at this point. I lined the straps with batting and added a decorative strip of bright blue fabric for additional strength.

I then layered it with a cotton batting. I used Warm and Natural. And the lining fabric, sewed around the outside, leaving an opening to turn it right side out.

The next step is to do some machine quilting. At this point the straps and outside pockets are not fully attached, so I can quilt the entire bag. To keep the fabric in place as I do this, I prefer quilting pins. I have found they work the best when doing the machine quilting to keep the layers from shifting.

For years I have been using Coats and Clark Dual Duty thread when I do my machine quilting. It is very strong and works well in my sewing machine.

A couple of years ago I bought a Juki sewing machine and I just love it. I use it to machine quilt full and queen size quilts because the throat is very large. And I cannot quilt without my gloves made by Fons and Porter. They are a perfect fit and really grip the fabric.

I stipple quilted and overall design on the entire bag. I then used a silver quilter’s pencil to write the word “Cupcakes” on one of the side panels of the bag.

With several colors of threads, I quilted over the letters to highlight them. And also added pink flowers as you can see in the picture later.
After the quilting was finished I sewed down the pockets and shoulder straps.
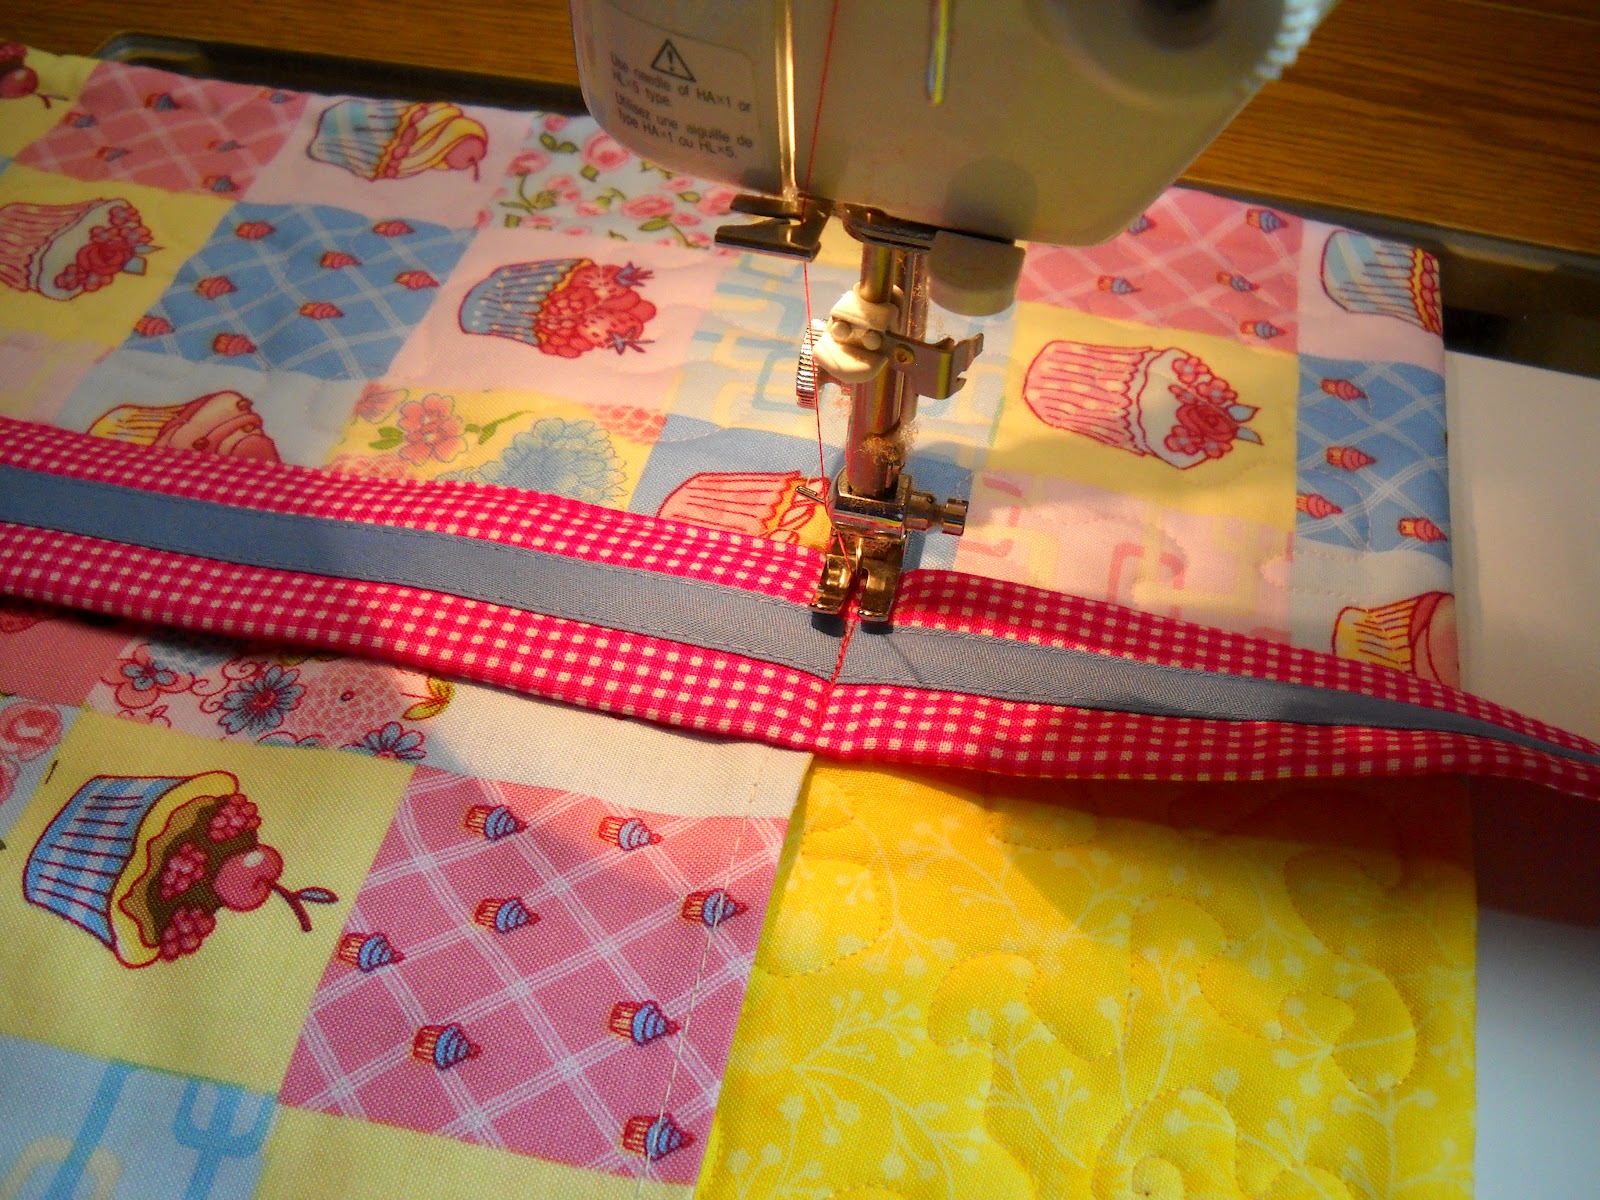
Here is where I attached the cupcake button, along with a few other fun colored buttons that I had come across in my button tin.

I like to have a very finished inside to my bags and have come up with a unique design in accomplishing this. After sewing the side seams take the bag and turn it inside out. I then lay it flat and cut off the point 2 ¾ inches from the point in each bottom corner.

I then cover that seam with a strip of fabric. After that all that is needed is to turn the bag right side in and the project is finished.
This would make an adorable bag for a little girl’s sleepover. I am sure all my granddaughters will want one.
I Love when I can see how a project is put together, this is really cool
ReplyDelete