
I wanted to create a wool art quilt that
would have a very feminine look to it, so with that in mind a chose one of my
art pieces that I had printed through Spoonflower.
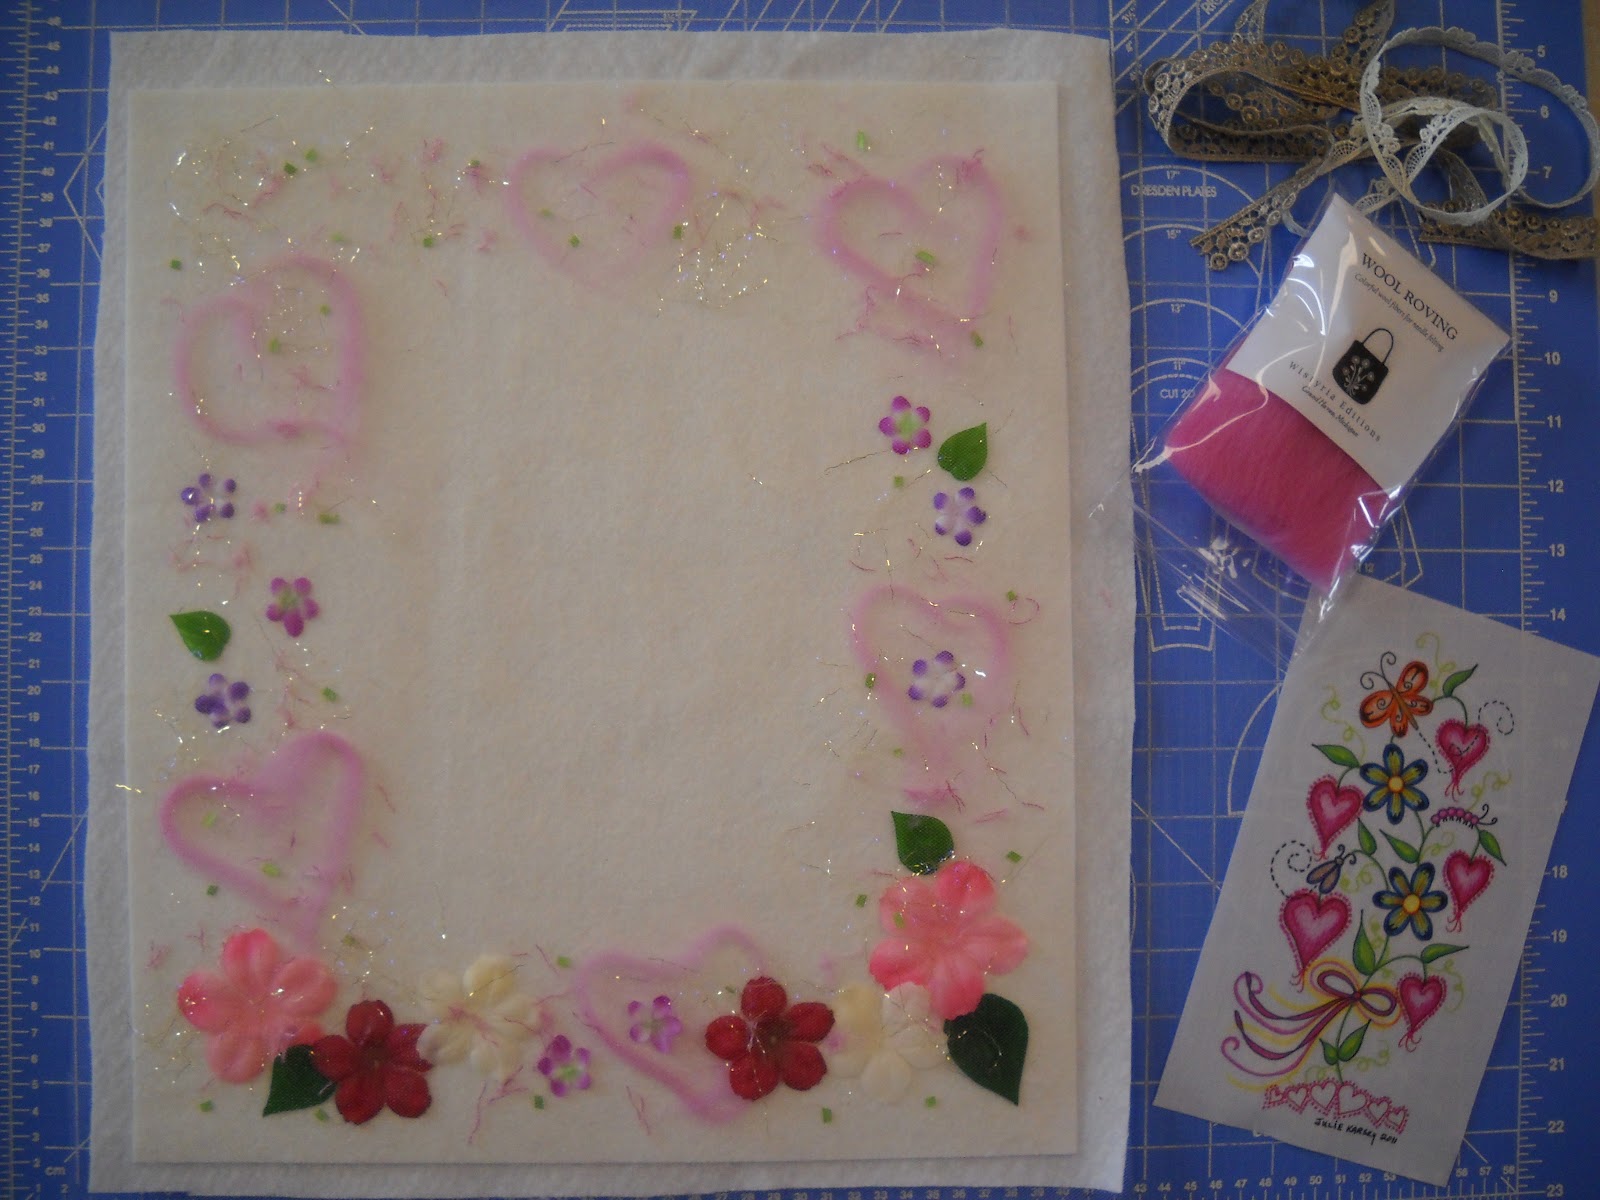
I trimmed the piece
of fabric art to use as the center of my quilt, and then started to arrange
silk flowers that I had taken apart and placed them onto my piece of creamy
wool that I am using as a base for the quilt. I lined the quilt with a piece of
cotton batting. I used roving wool to create the shadowy hearts in the
background.

This is really coming
together, and it has a very soft look that I was trying to achieve.

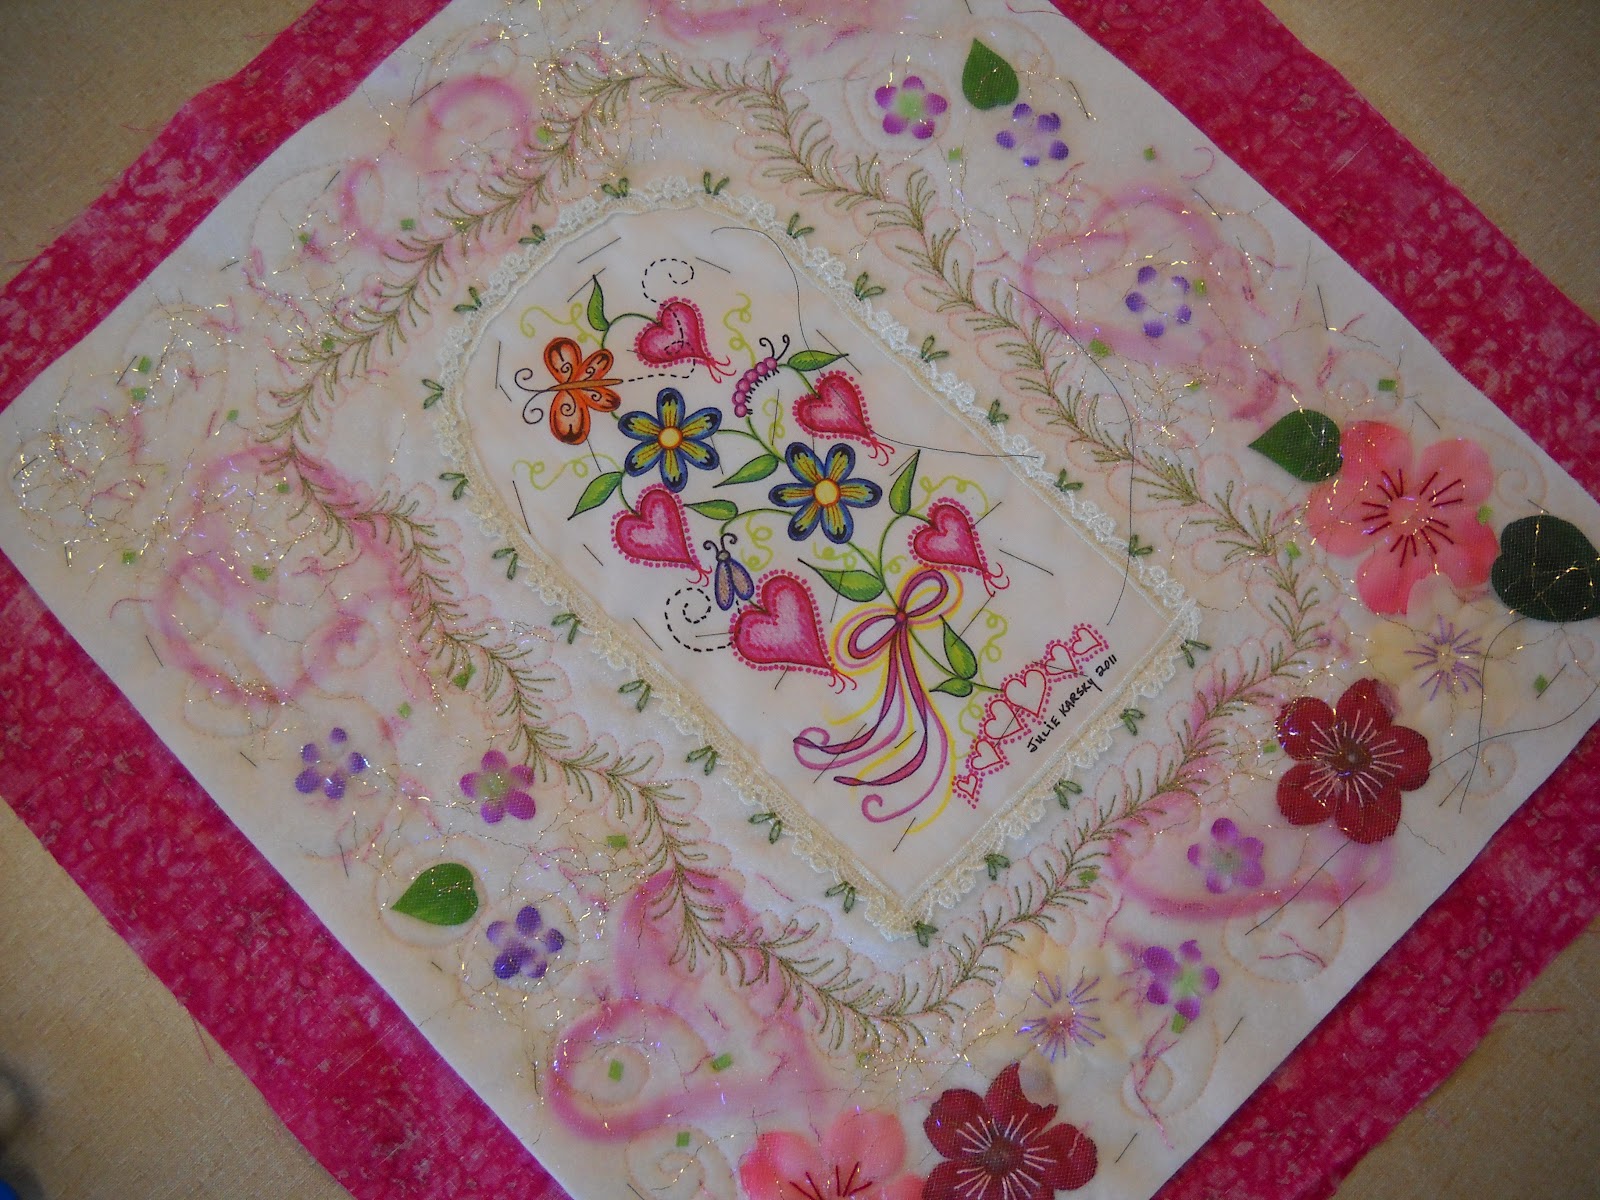
I gave the quilt a
sprinkle of gold Angelina fibers, and then covered the top of it with white
bridal tulle. This is done to hold all the loose flowers and leaves in place
and to also keep in place the roving wool and Angelina fibers. It was time to
take it to the machine and start some thread painting. I started to stitch some
feathers to the border of the quilt and frame in my little center block.

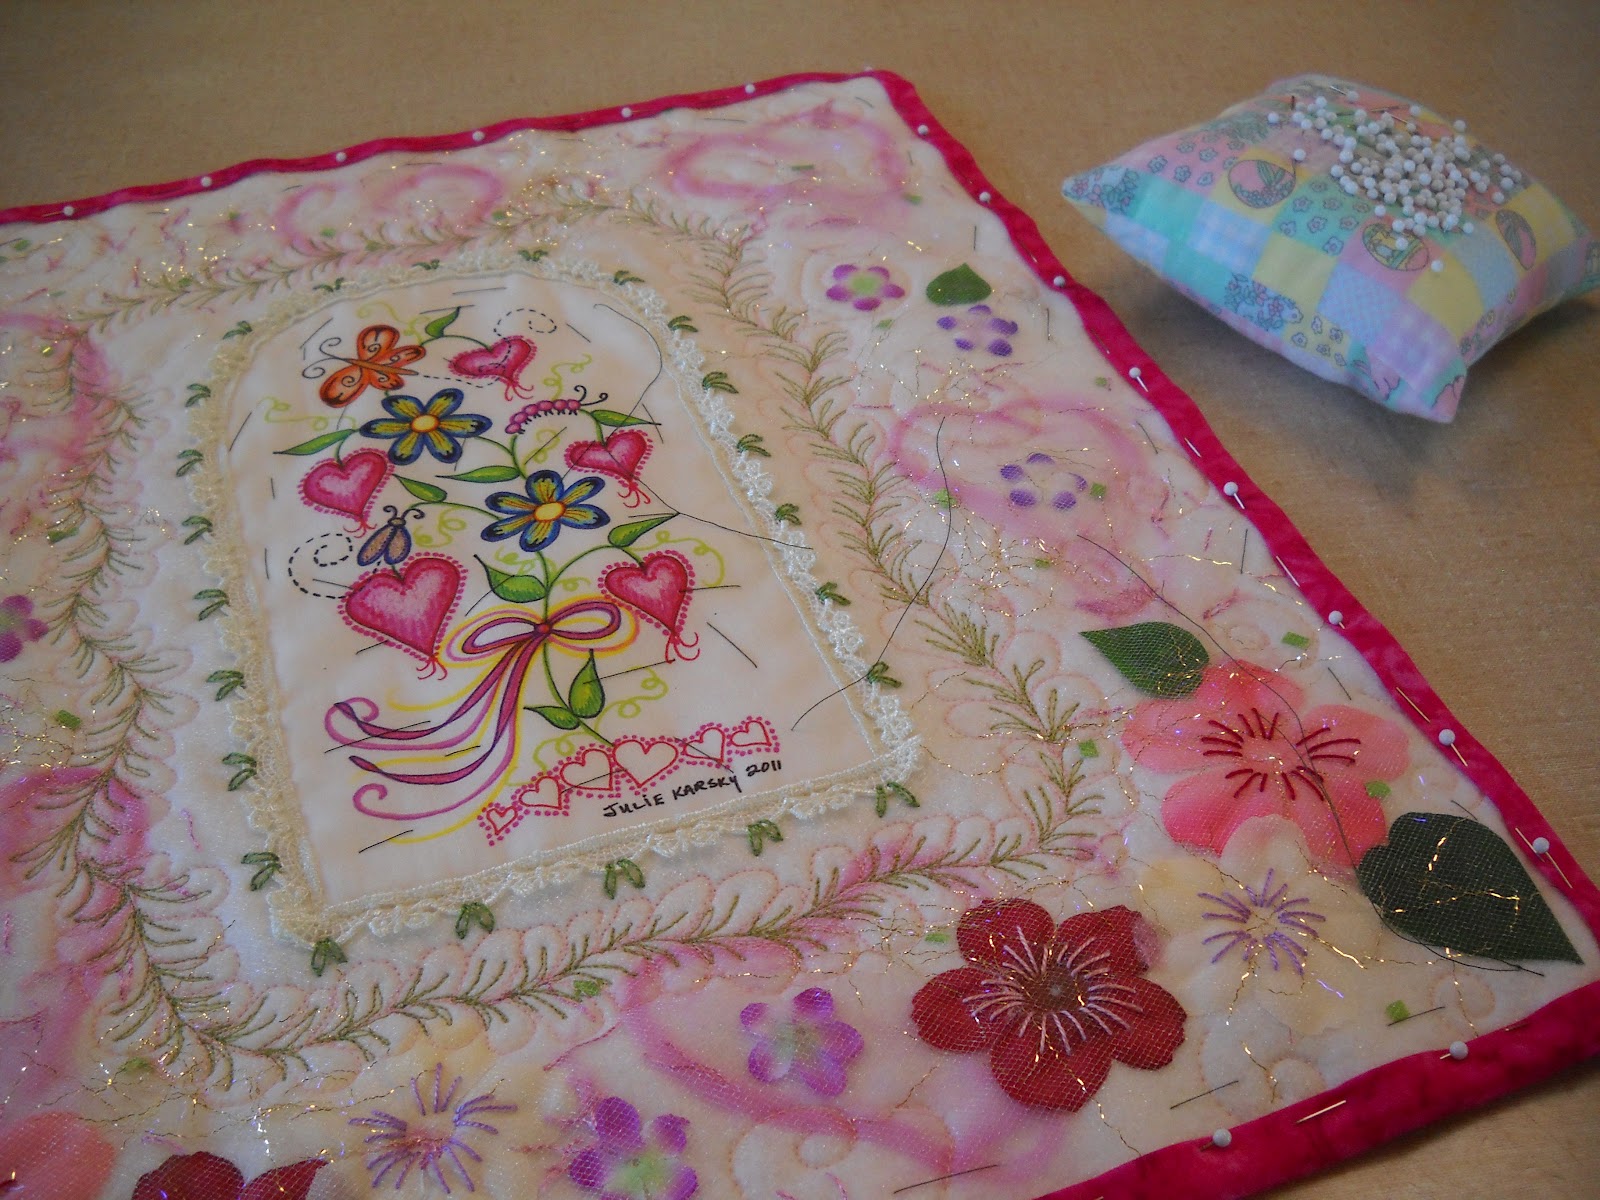
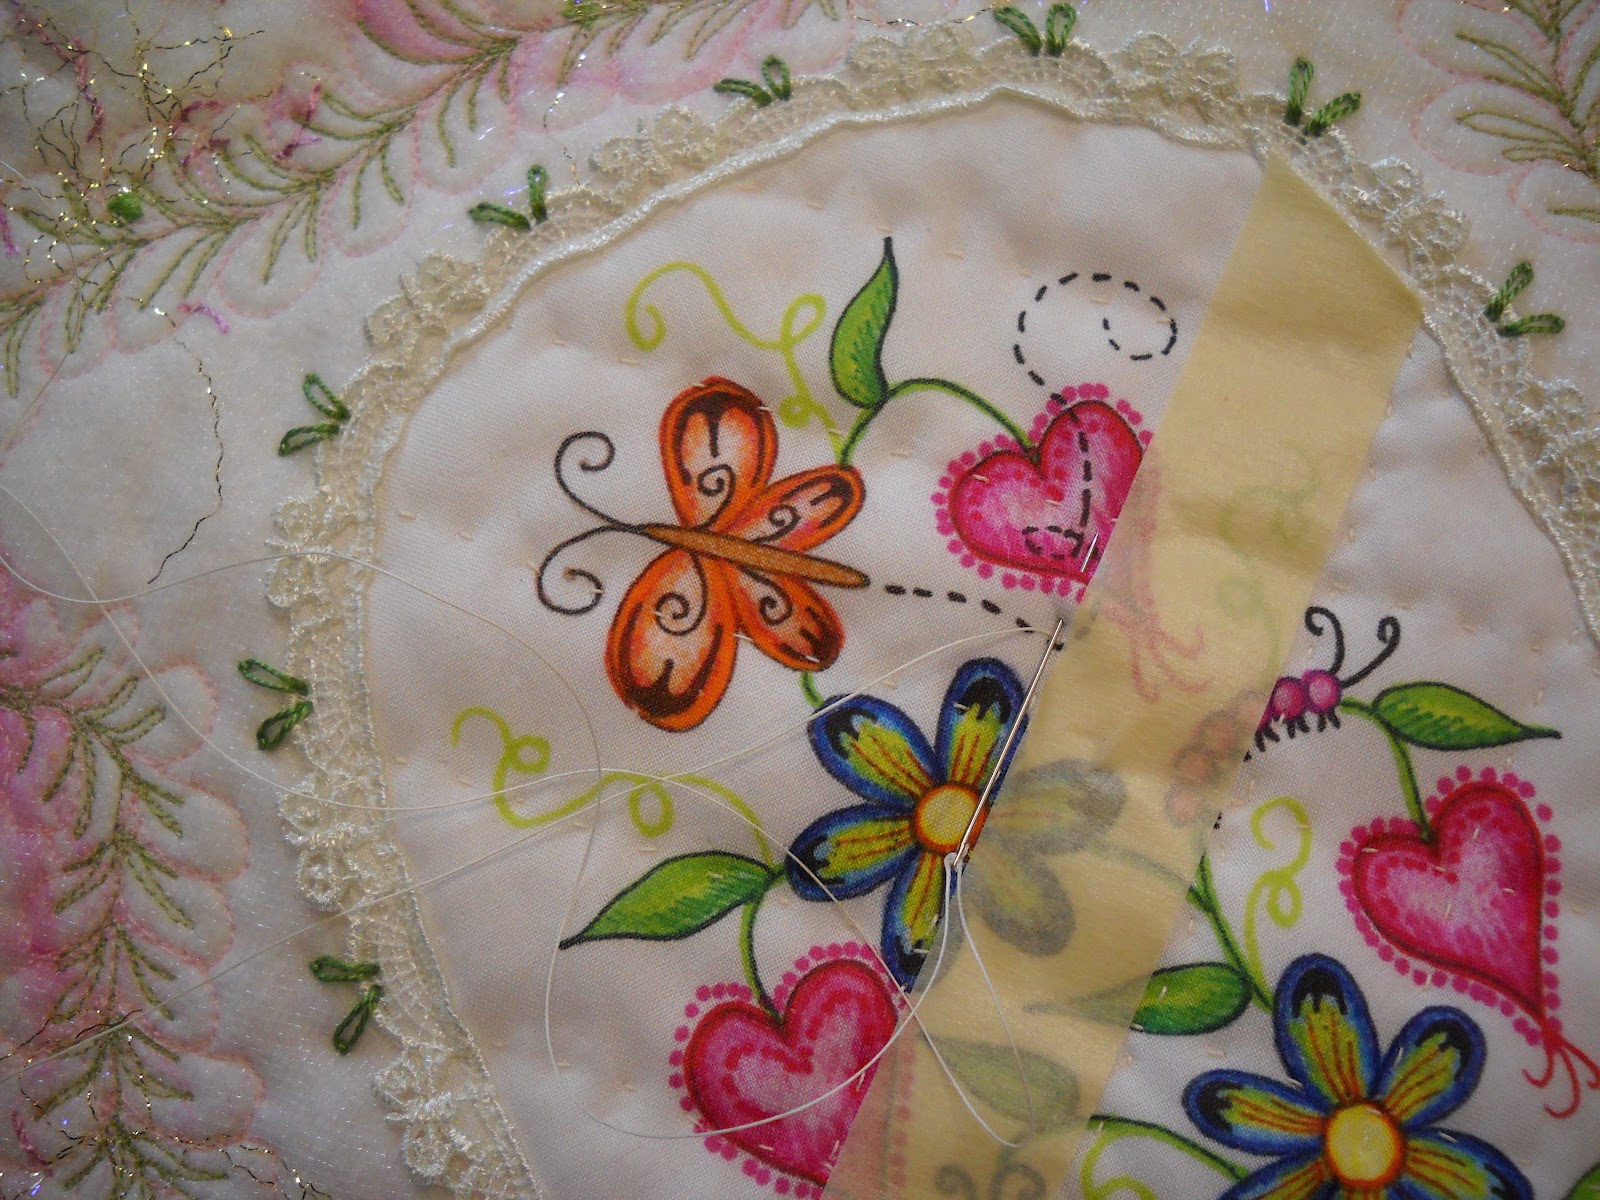
I placed my fabric block the middle of the quilt, and pinned
it in place.

To hide the edge of
the fabric block, I used a pretty lace and stitched it to cover the edge of the
fabric. It took a little time to get everything in place, but with a little perseverance
and I was ready to continue.
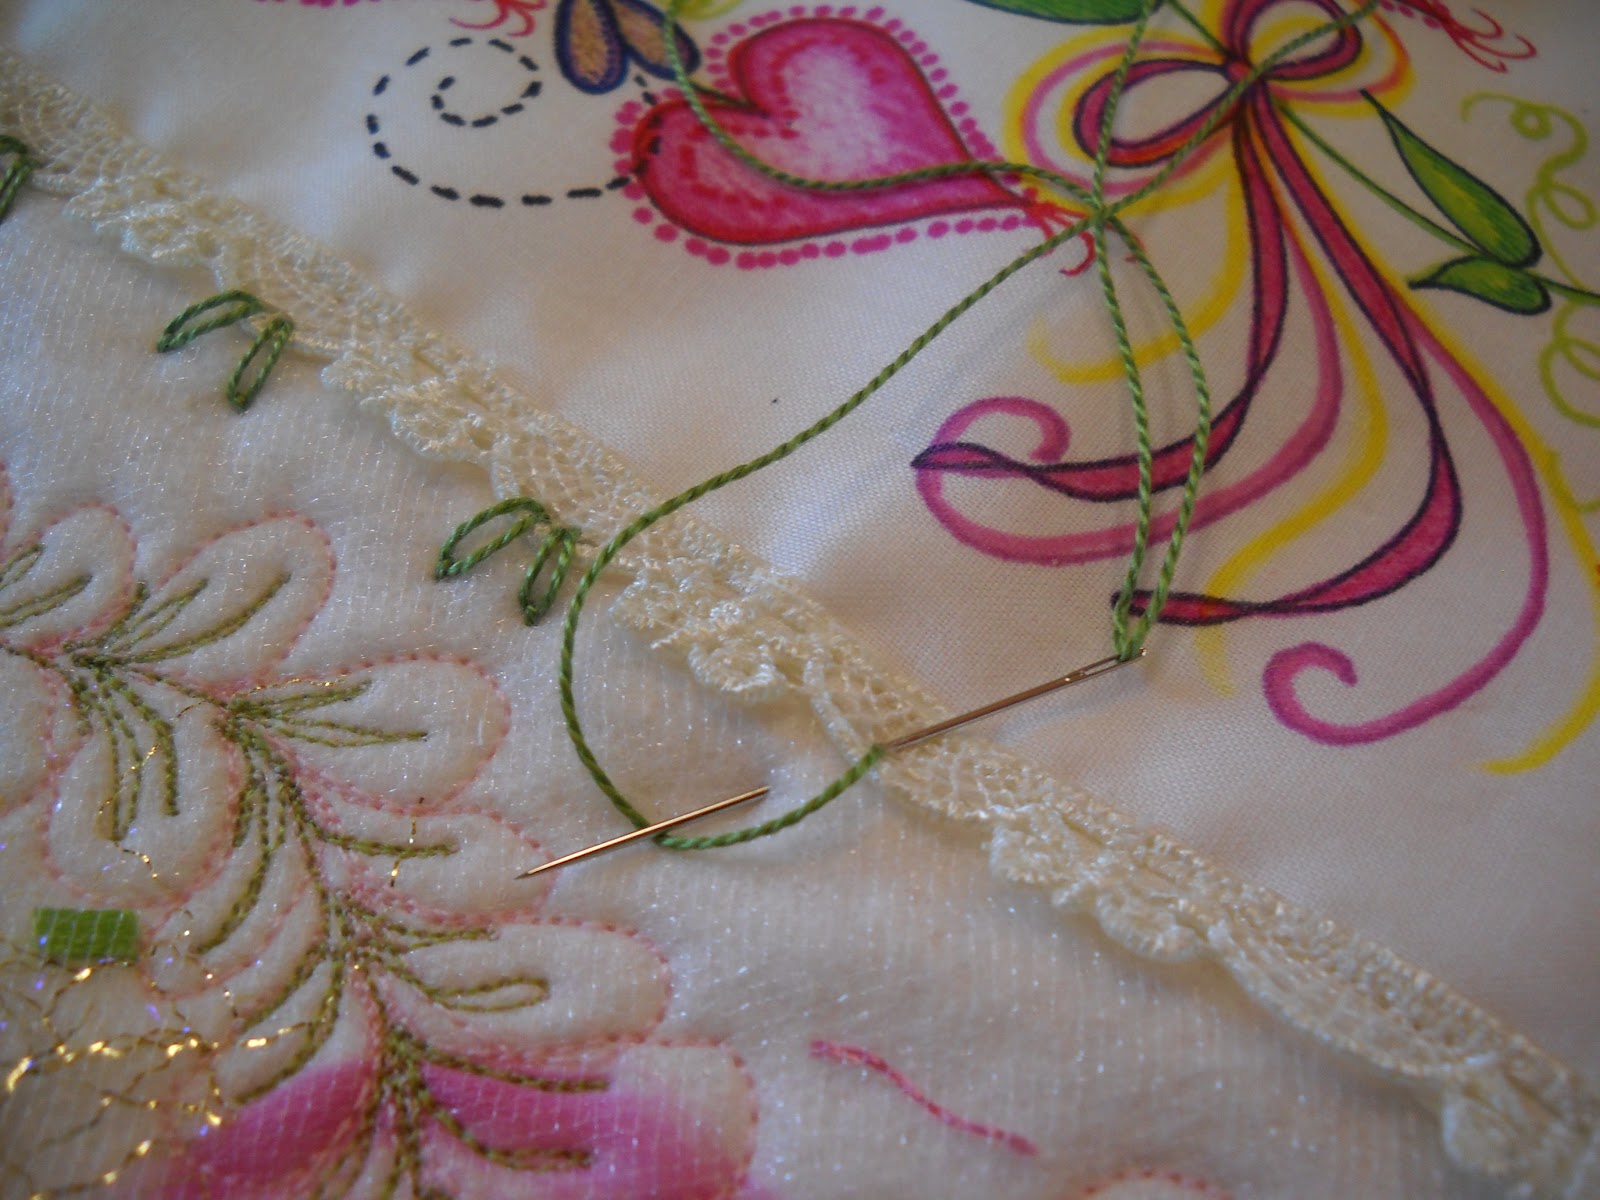
It looked a little
bare around the outside of the lace, so I added some hand embroidery with pearl
cotton using the lazy daisy stitch in a sage green.

Now it was time to
really give the quilt some rich detail and enhancement. I again went through my
selection of pearl cotton threads by DMC and using needles by John James, I
stitched the inside of the flower petals. I really enjoy sewing with the pearl
cotton in a size 8. It has a nice twist and sheen to it. I stopped buying
regular embroidery floss years ago.

This is a close up of
the flower petals after they have been stitched with the pearl cotton.

With that complete I
laid the quilt on my June Tailor cutting mat, and with the Omnigrid ruler and
my Olfa rotary cutter I cut the batting from the outside of the quilt and
trimmed it to the finished size I wanted.
I decided on a pink
fabric to the backing and I basted all the layers into place. I then took it
back to the machine and added more machine quilting.
To create the binding
I cut the backing fabric to 1 inch from the outside edge of the quilt top and
rolled the fabric twice over to the front of the quilt. I pinned it in place
and hand stitched it in place with Coats and Clark hand quilting thread.
I decided to do some hand quilting over my printed fabric in
a cross hatch pattern. To avoid using a pencil to mark the lines, I used
masking tape. This is a nice way to get an even grid while hand quilting, and
not having to worry about marking on the quilt.

Oh yes, this is
taking shape nicely. But even with all that has been done, I felt it needed
more.
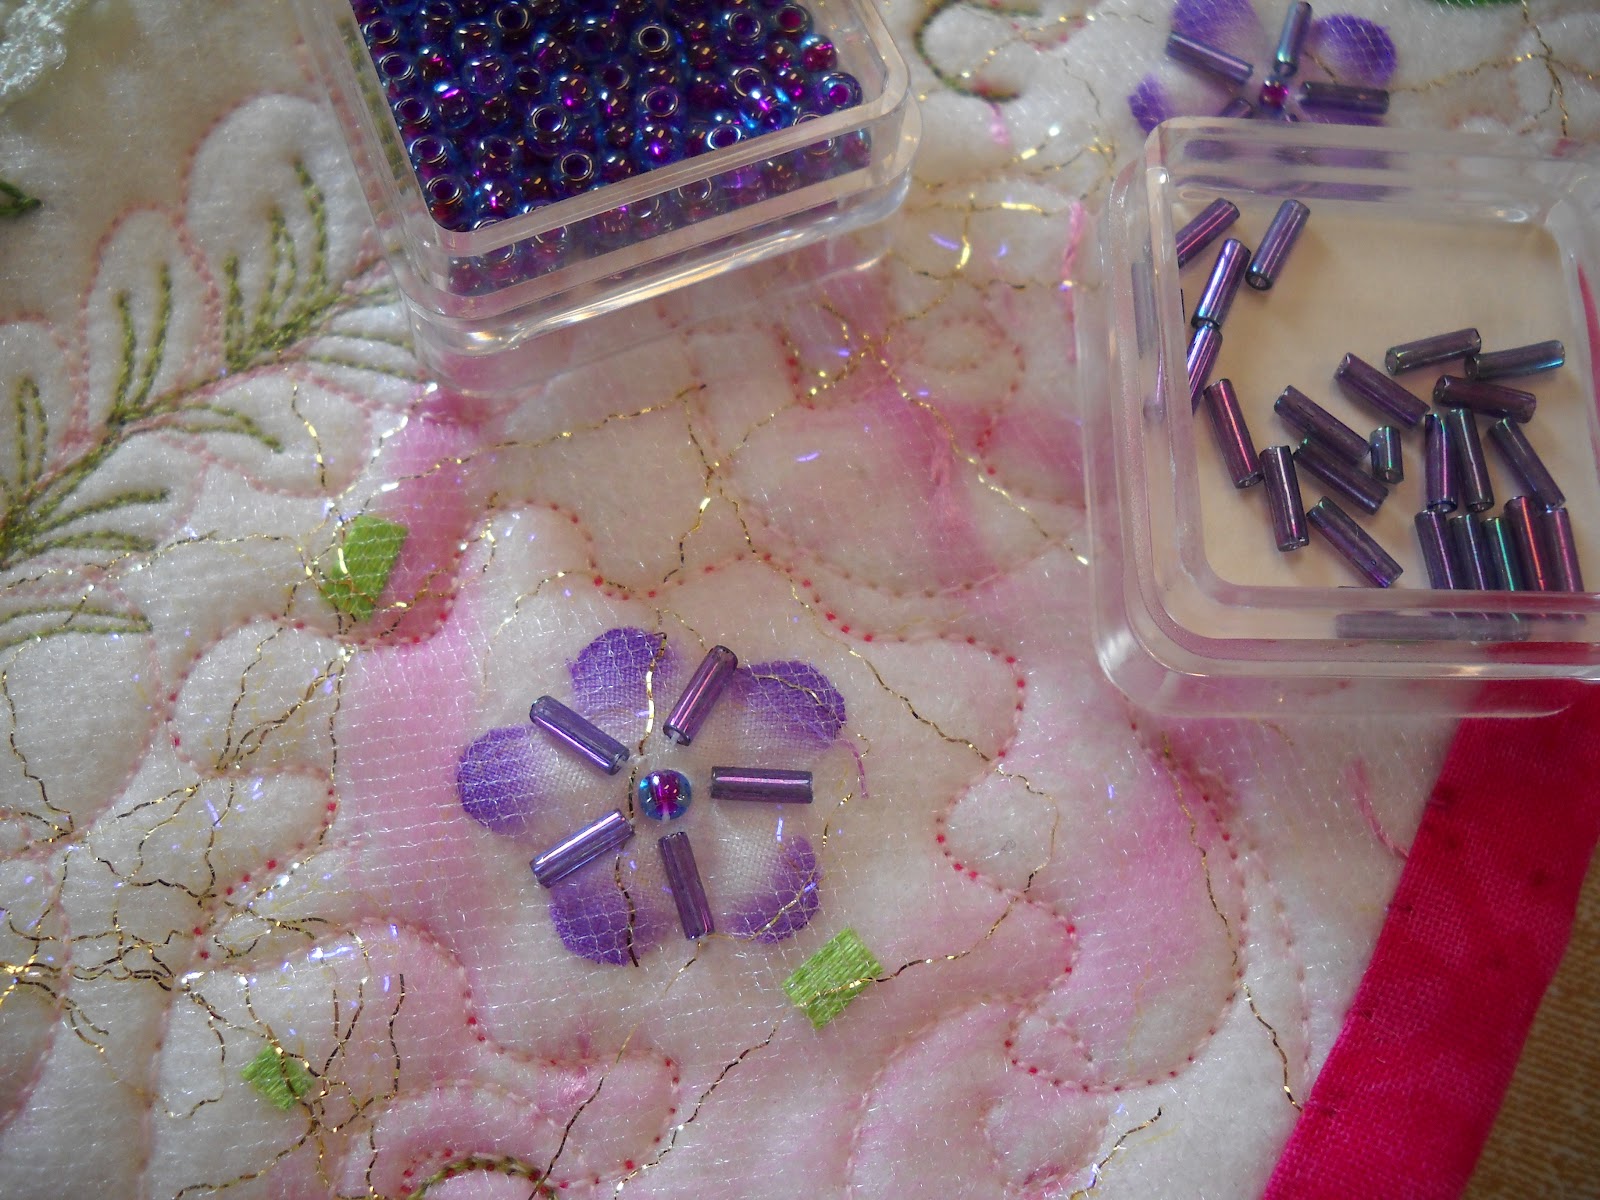
To give this quilt
extra sparkle that will really be noticed, I hand stitched bugle beads inside
the small flowers and added a round bead to the center.
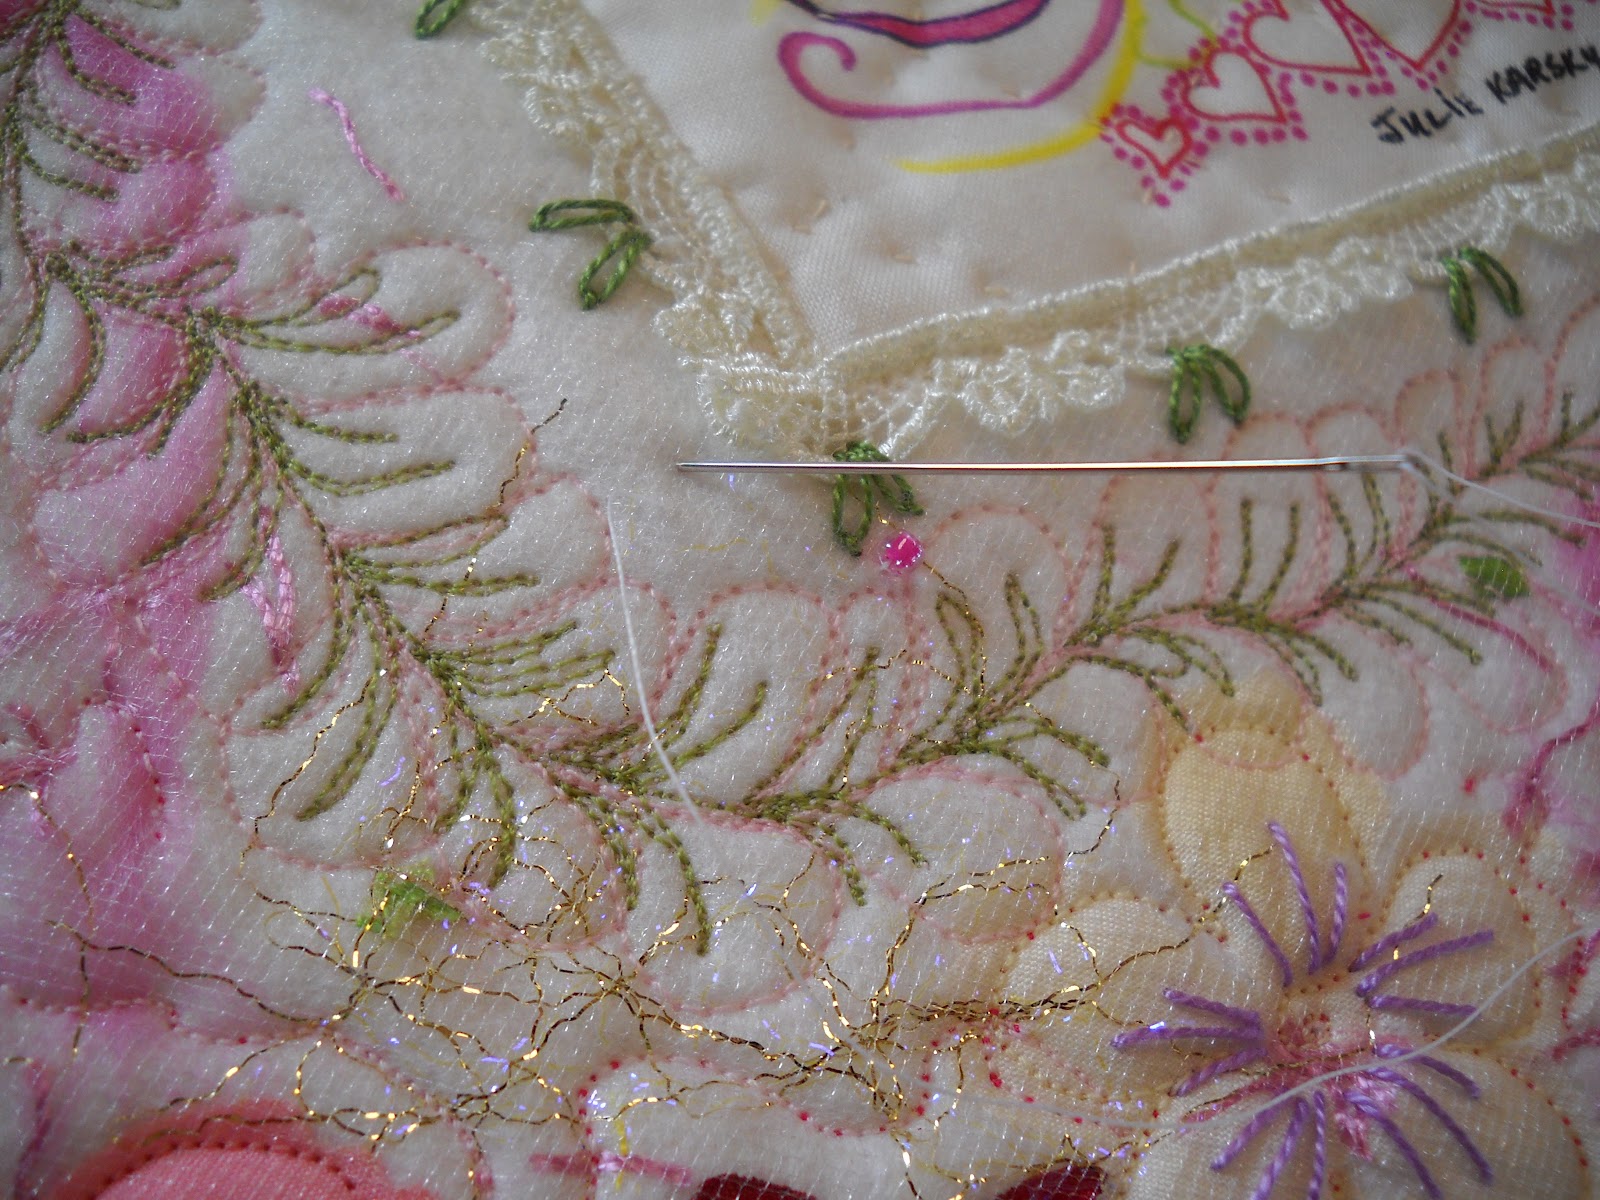
Here I placed little
pink glass beads randomly around the border of the quilt. I think it is
finished. I have included a few close ups of the completed quilt for you to
enjoy as well.


No comments:
Post a Comment